How to Use ReachUC for Android
- Outgoing Calls
- Incoming Calls
- In Call Functions
- Recording Calls
- Checking Voicemail
- Visual Voicemail
- Call Transfer
- Starting Conference Calls and Merging
- Split Conference Calls
- Do Not Disturb/DND
Outgoing Calls
Once you log into your ReachUC Mobile app you will be brought to the Dial Pad by default.
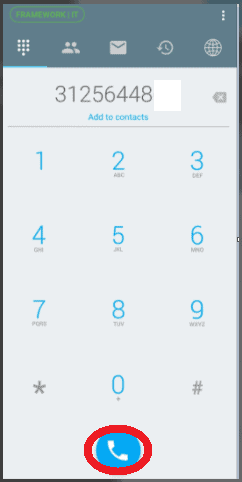
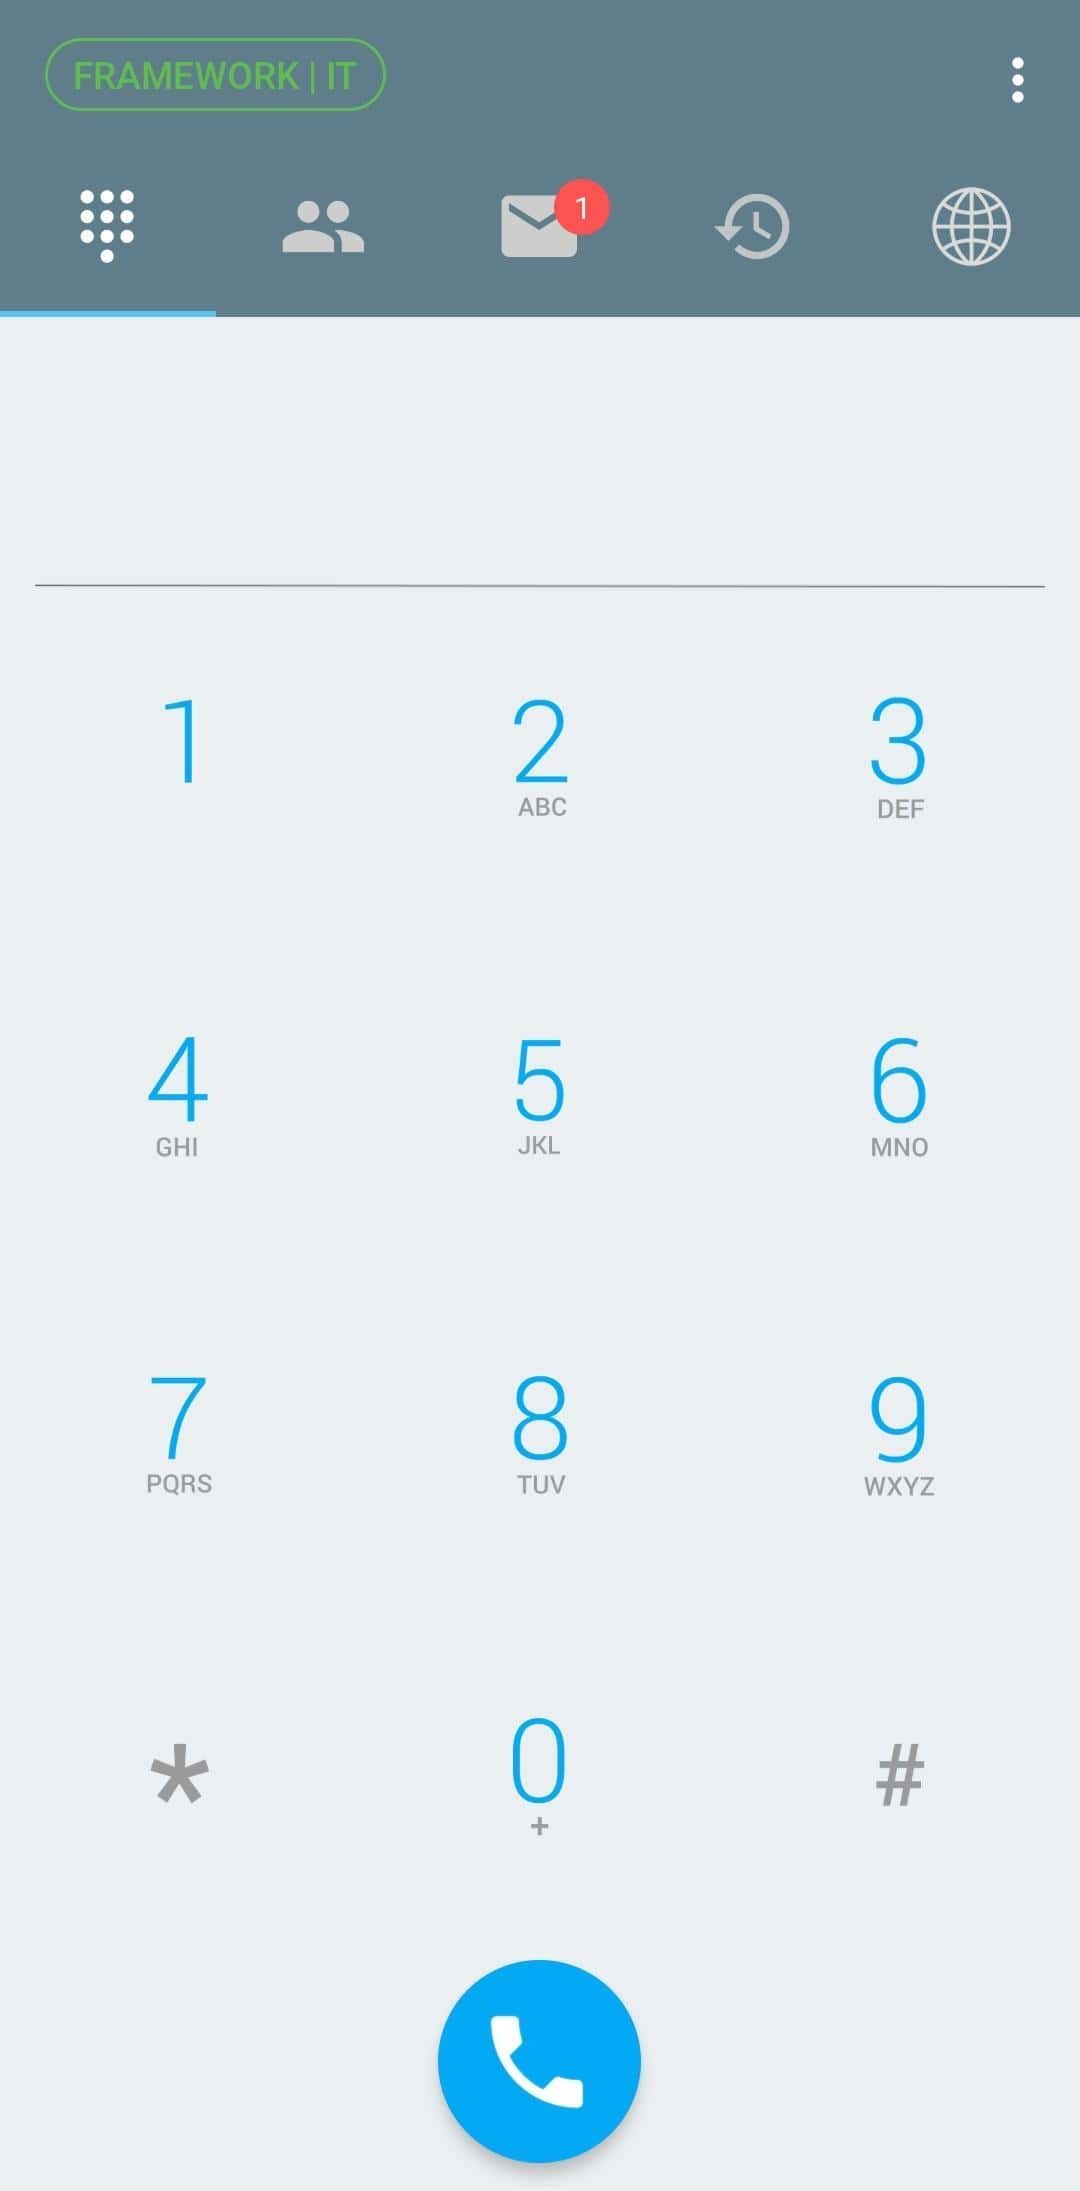 From here you can dial a phone number or extension using the Dial Pad, followed by the Blue Phone icon.
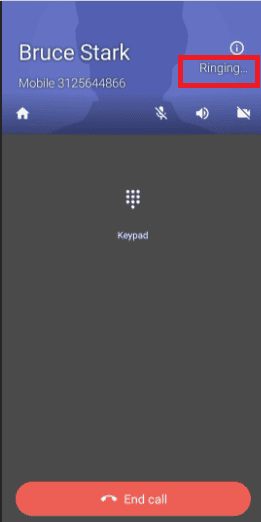
 You will then see the following screen while the call is ringing.
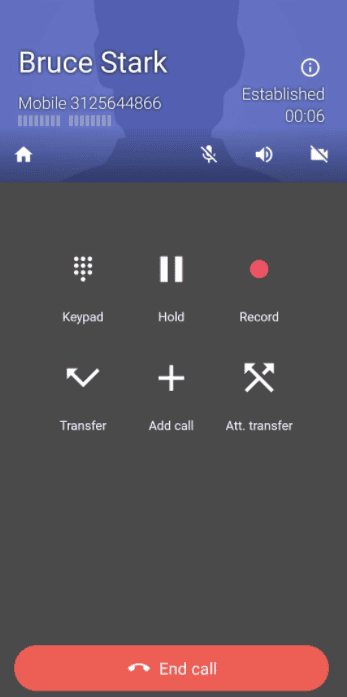
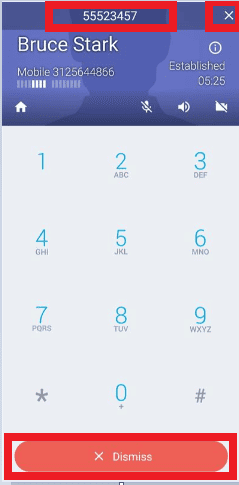
 Once the call is answered successfully you will be brought to the following screen.
Incoming Calls
While your phone is asleep or with the ReachUC app open, incoming calls will alert you with the following screen.
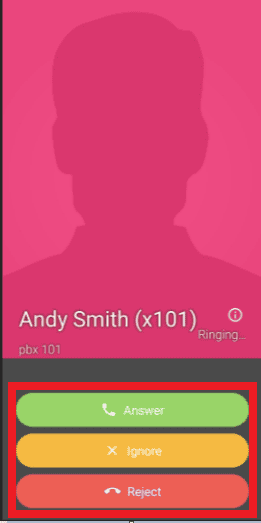
Answer – Answers the incoming call.
Ignore – Ignores the call but caller still completes the ring cycle on their end before going to your voicemail.
Reject – Will reject and end the incoming call. The caller will then be sent directly to your voicemail.
- If you skipped allowing Draw Over Permission during the initial app set up, you will see the following when receiving an incoming call while your mobile device is awake and not in the app.
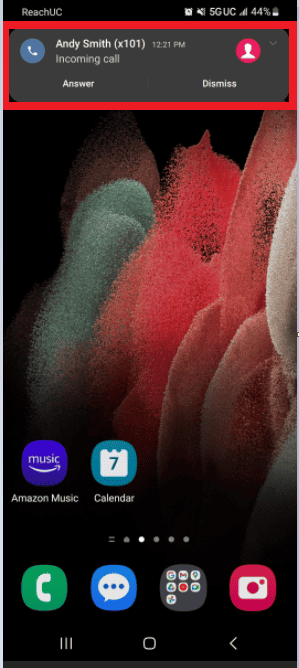 From this pop up you can select Dismiss to Reject the call. You can Answer the call by clicking on the Caller’s Name.
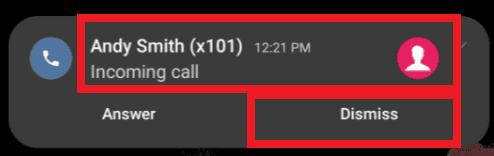 Clicking the caller’s name will bring you to the following screen.
Answer – Answers the incoming call.
Ignore – Ignores the call but caller still completes the ring cycle on their end before going to your voicemail.
Reject – Will reject and end the incoming call. The caller will then be sent directly to your voicemail.
In Call Functions
You will notice the following icons can be clicked on which will give you additional functions during the call. When certain functions are enabled, there will be a shaded circle around the icon.
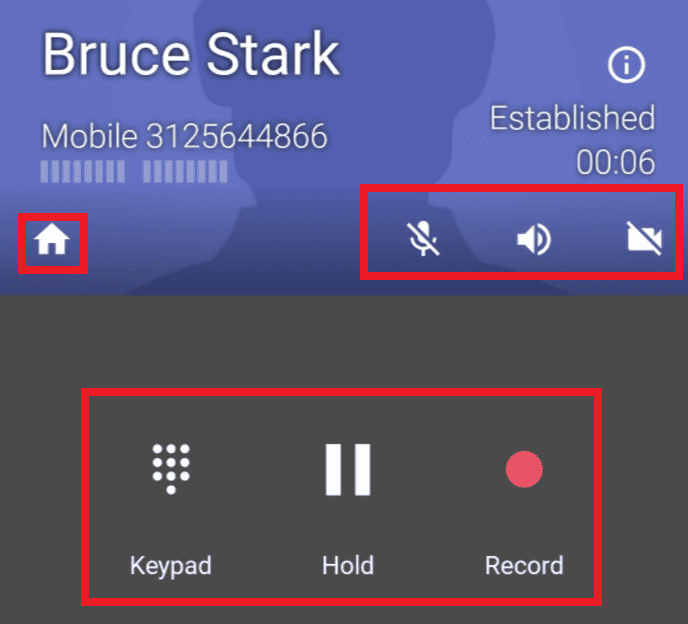 Clicking the Mic icon will let you Mute or Unmute your Mic.
 Mute Off
 Mute On
The Speaker icon will place the call on Speakerphone.
 Speaker Phone On
 Speaker Phone Off
The Video icon will enable your mobile phone camera for video chat. When you click on this icon you will see the following sub-menu pop up allowing you to select which camera to use.
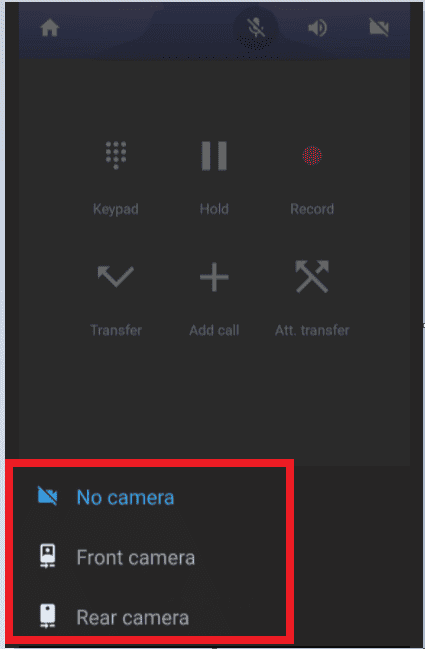 Camera Selection Pop-Up Menu
 Camera Off
 Camera On/Front Camera
 Camera On/Rear Camera
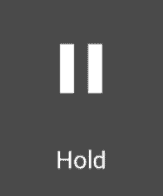
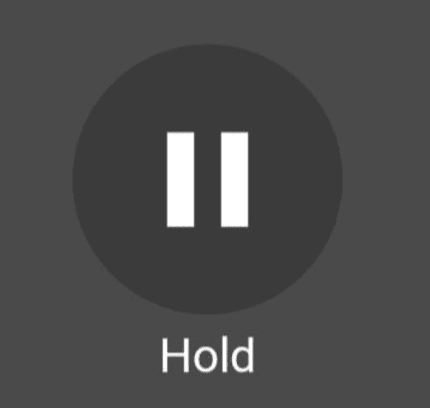
Click on the Hold icon to place the caller on hold. Click on Hold again to resume the call.
 Caller is NOT on hold
 Caller is on Hold
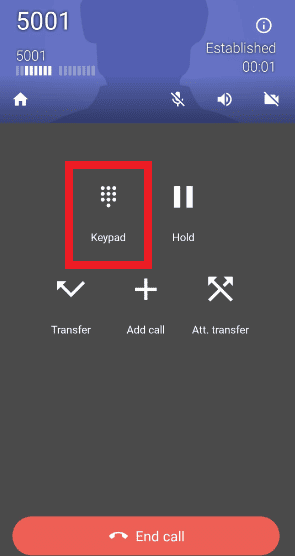
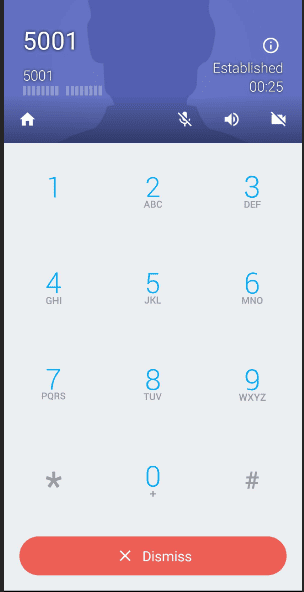
Clicking on the Keypad icon will bring up a Keypad to use while on a call. This Keypad will let you enter keys for options. For example, selecting an automated attendant option or following voicemail prompts when checking your voicemail. It is NOT used to make an outgoing call while on a call.
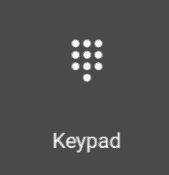
At the top of the Keypad screen, a log of the numbers you have selected will appear. You can remove this by clicking on the X icon. Clicking on Dismiss will exit the Keypad and return you to the in-call functions.
Recording Calls
Some calls will give you the option to record the conversation. This can be done by clicking on the Record icon. You can start and stop recording anytime during the call by tapping on the Record icon.
 Pulsing Red Circle – Recording is in progress
 Recording Off
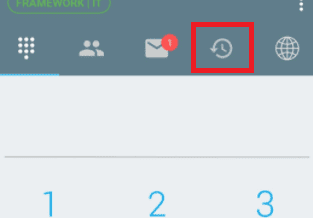
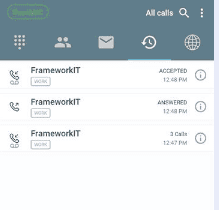
To access the recording from the home Dialpad menu screen click on the call history icon.
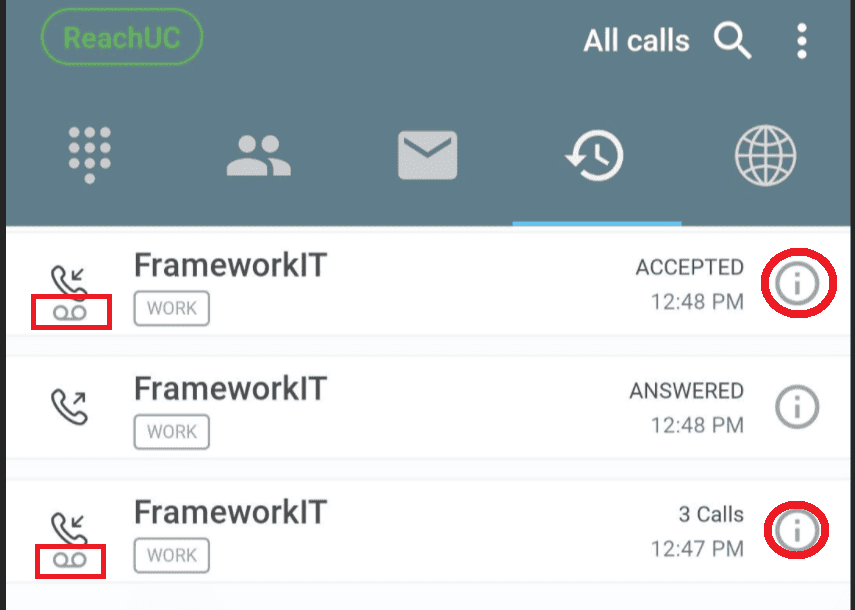
 You will then be brought to your call history. Calls that have been recorded will have a recording icon under the phone. To access the recording click on the “i” icon.
 You will then be brought to the following recorded message screen.
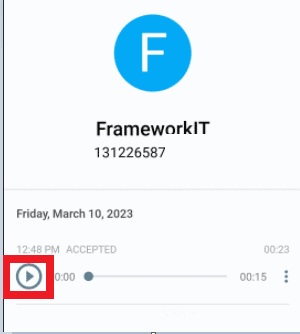
Press the Play icon to play recorded message.
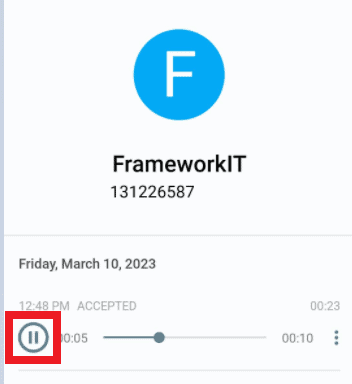 Press the Pause icon to Pause recorded message
Clicking on the Ellipsis (3 dots) will bring up the following sub-menu.
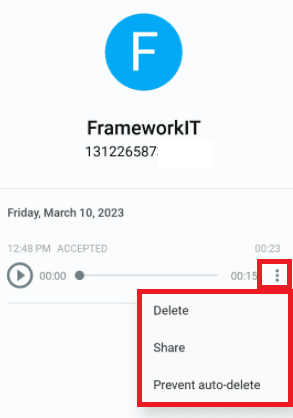
Delete – Deletes recorded message.
Share – Share the recorded message.
Prevent auto-delete – Saves recording to prevent auto-deletion after retention time expires. (Retention time varies)
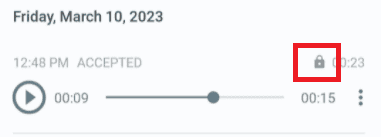
If you select Prevent auto-delete you will see a Lock icon if successful.
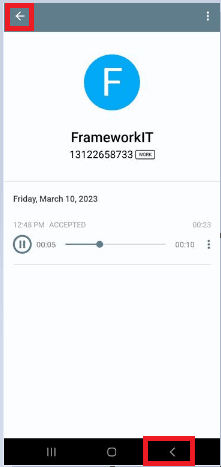 Press the back Arrow in the app or on your mobile phone to return to the main options menu.
Visual Voicemail
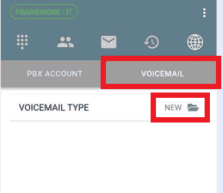
You can also use the visual voicemail feature on the app to check voicemail. To do this, click on the Globe PBX icon from the dial pad menu screen.

From here click on the Voicemail tab then click on the NEW folder icon.
 You will then see the following visual voicemail options appear at the bottom of the screen. Click on the NEW option to load the voicemails in your inbox.
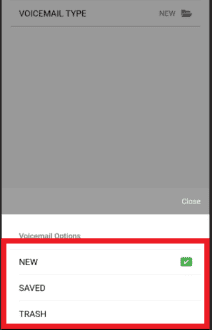 NEW – Retrieve new voicemails in inbox.
SAVED – Retrieve saved voicemails.
TRASH – Retrieve voicemails sent to trash (emptied daily).
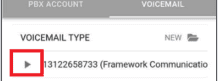
When the voicemail messages load, click on the Play icon to play the voicemail message you wish to hear. The recorded message will now begin playing.
 Click on the Stop icon to stop the recorded message.
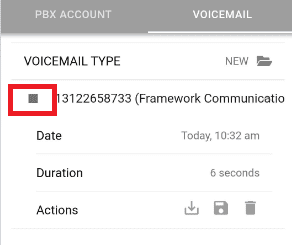 You will also notice the following voicemail options have appeared.
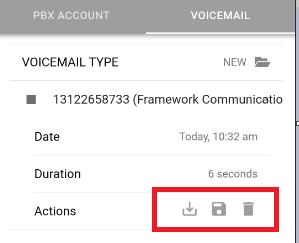
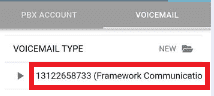 Note: the voicemail actions options can also be accessed without playing the message by tapping the phone number/caller name instead of the Play icon.
 Click on the Download icon to download the voicemail to your mobile phone.
![]() Click on the Save icon to move the voicemail to the Saved folder.
Click on the Save icon to move the voicemail to the Saved folder.
![]() Click on the Trash icon to move the voicemail to the Trash folder.
Click on the Trash icon to move the voicemail to the Trash folder.
Checking Voicemail
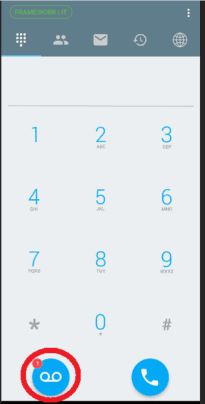
If you have voicemail in your inbox, you will receive a notification that appears as a voicemail Recording icon on the bottom left corner of the Dialpad/Keypad screen. Click on it to check your voicemail. You can also dial 5001 to access your voicemail box.
 Once you click on the voicemail icon you will be connected to your voicemail and the in call features screen. To follow the voicemail audio prompts and make selections, click on the Keypad icon.
 The following keypad will appear. Use this to enter your pin and navigate the voicemail menu options.
Call Transfer
While you have a call-in progress you will notice the following icons appear on the screen
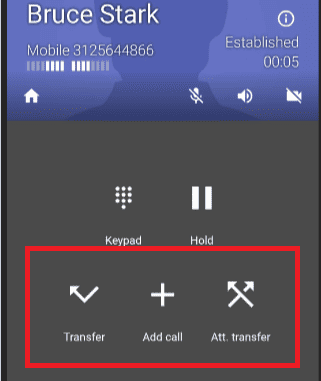
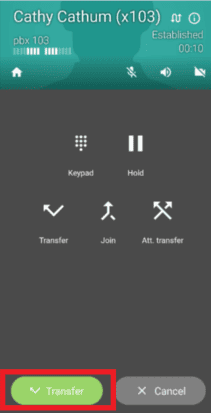
 To blind transfer a call directly to another extension click on the Transfer icon. This will place the caller on hold.
You will see the following dial pad screen appear. Use the dial pad to enter the extension or external phone number you want to transfer the call to followed by the Blue Phone icon. The call will then automatically transfer to the extension or external number you dialed.
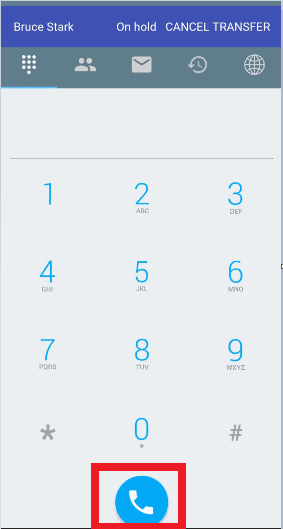 To Cancel the transfer and return to the call, click anywhere in the highlighted area where the caller’s name, on hold and CANCEL TRANSFER can be seen.

 To transfer but notify to whom you are transferring the call to first, click on Att. Transfer icon. This will place the caller on hold.
You will see the following dial pad screen appear. Use the dial pad to enter the extension or external phone number you want to transfer the call to followed by the Blue Phone icon.
Once whom you are transferring the call on hold to answers, you will be able to speak with them before transferring the call over. You will notice the following options appear on the screen.
 Click on the Green Transfer icon on the bottom left of the screen to complete the Attended Transfer.
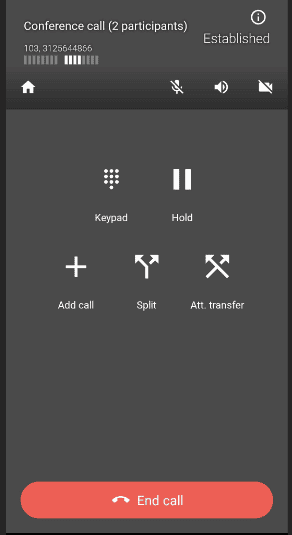
Starting Conference Calls and Merging
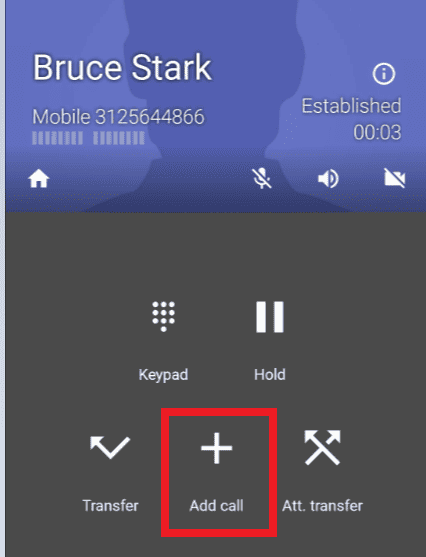
While on a call you will notice the following icons appear on the screen. You can add another call to begin a conference call by clicking on the Add call icon. Note: This does not place the active call on hold.
 This will bring you to the dial pad menu. If it opens in the wrong tab click on the dial pad icon tab to open the correct menu. You can exit the dial pad menu by clicking BACK TO CALL.
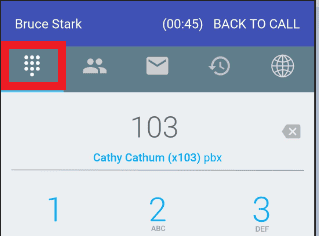 If it opens in the wrong tab click on the dial pad icon tab to open the correct menu.
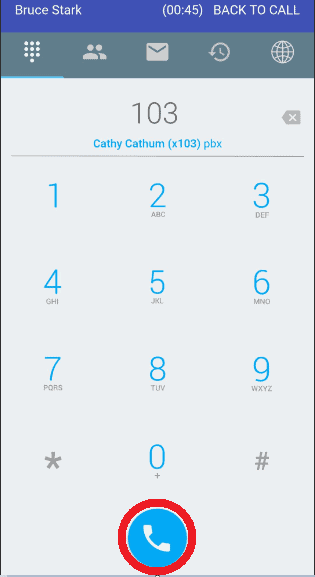
 Use the dial pad to enter the extension or external phone number you wish to conference in followed by the phone icon.
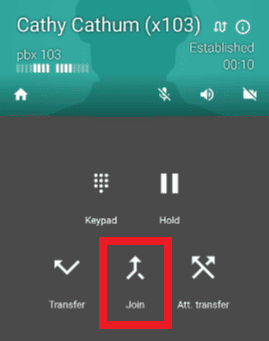
 Once whom you want to begin a conference with answers the call you will see the Join option on the screen.

 Click on the Join icon to merge the caller on hold into the current conversation creating a 3-way conference call.
You will see the following screen once you successfully merged all calls into a conference call. Note: To add more callers to the conference, click on Add call and repeat the process.
 If you are on a call or a conference call already and receive an incoming call, you can add them to your call or conference. To do this answer the incoming call. Then click on Join.
Split Conference Calls
While on a conference call you will see the option to Split the call.
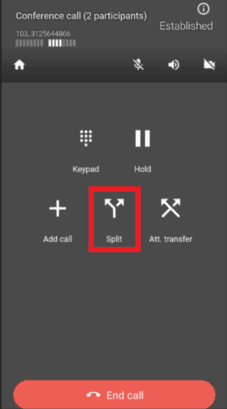
 Click on the Split icon to split the conference call. This will separate all callers from the conference and place them on hold.
Once the conference has been split click on the Switch icon to switch between separated calls.
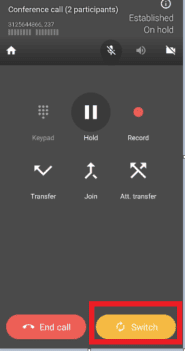
If you had a conference call with 3 or more people, clicking on the Switch icon will bring up the following option to select which call to switch to.

Do Not Disturb/DND
To enable DND and prevent incoming calls to the ReachUC app, click on the Framework | IT icon on the top left corner of the home screen.
/


