

How to Create an Email Signature in Outlook
Content
How to Create an Email Signature in Outlook
How to Create an Email Signature in Outlook
Windows
Office 365
Mac
Windows
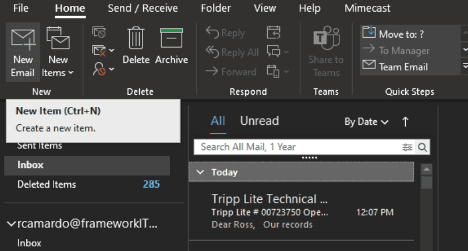
In Outlook for Windows, click on "Create a New Message"
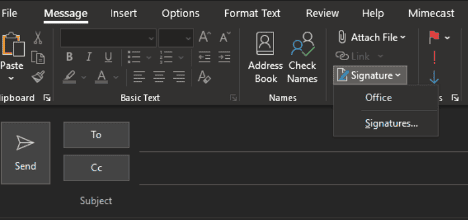
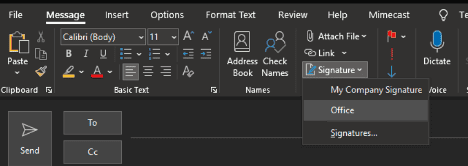
On the "New Emails" message tab, navigate to the signature drop-down and select "Signatures."
A new window will open where you can review existing signatures or create a new one.

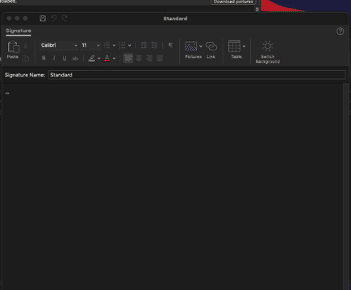
Selecting new will prompt you to name your new signature. Framework IT recommends giving your signature a specific name so you can differentiate between multiple signatures.
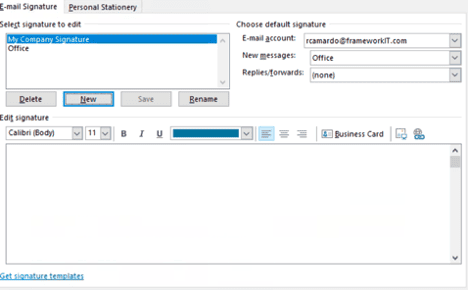
You are now able to begin creating your new signature. To the right are option boxes for how you want this signature to behave and what email account should use this if you have multiple accounts in Outlook.
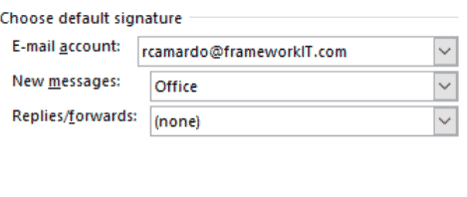
When setting up your default signature, you are given a few options:
- New messages would be for any messages you are sending that are not a reply or a forward to an existing email chain.
Replies and forward will automatically append your signature to any existing email chains.
You can leave these blank if you would prefer to manually add your signature on a case-by-case basis.
The signature editing window is where you will create your signature. Here you can type, import images, and add hyperlinks.
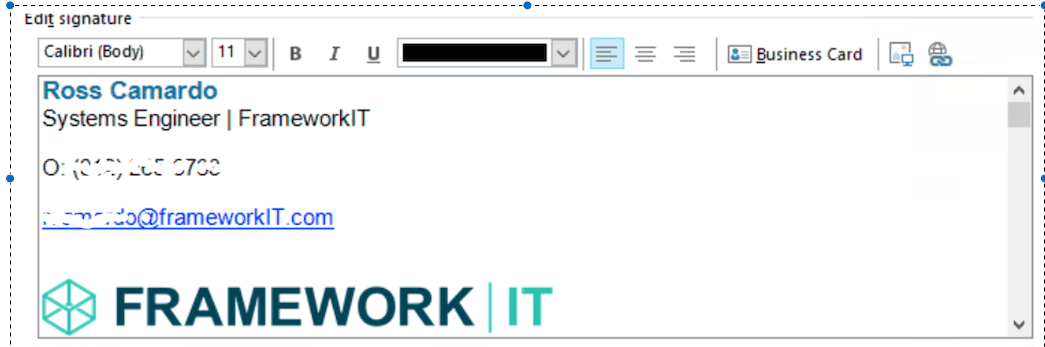
As an example, you are not limited by the viewable space as the signature can continue to scroll down.
Once you are happy with your signature you can select "OK" to save. The signature editing window will close.
If you enabled the automation previously the signature should already be added and showing in your new email.
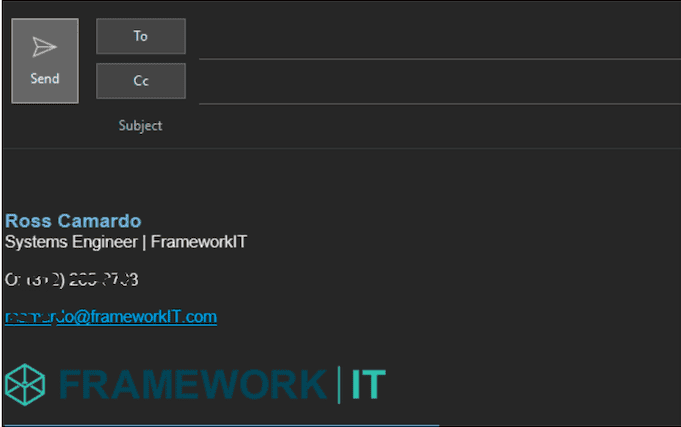
If you chose to not use the automation you can always add your signature manually by using the signature option again and selecting the signature you would like to add to the individual email.
Office 365
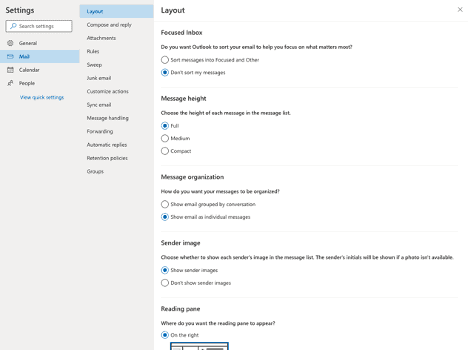
Once logged into O365 and in Outlook, navigate to the settings tab and navigate to "View All Outlook Settings." You will then be presented with the full settings menu.
Navigate to the "Compose and reply" option under "Mail."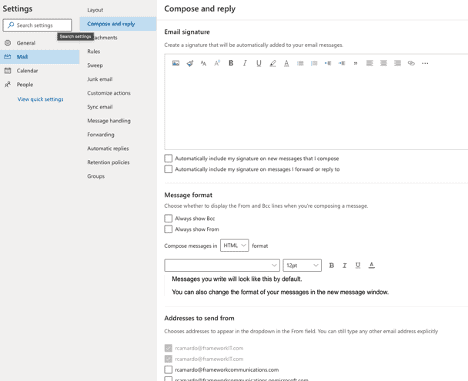
Now you can begin creating your signature by adding text, images, and hyperlinks. Then you will select how your signature should behave:

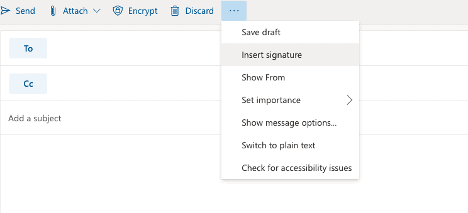
If you have enabled some of the above options your signature will automatically be inserted. To insert a signature manually you can navigate to the additional options.
Mac
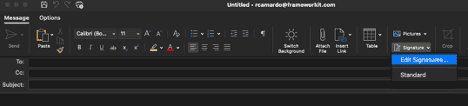
Create a new email message and in your new email message, navigate to "Edit Signatures."
From here, you can add new signatures and select existing signatures to edit.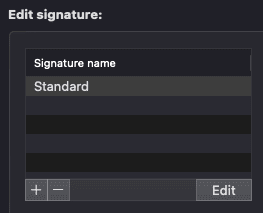
Select "Edit" to open a view where you can now add text and images.
Once you have edited your signature, you can close the window and will be returned to the signature tab where you can preview your signature.